> ## Documentation Index
> Fetch the complete documentation index at: https://docs.learnpack.co/llms.txt
> Use this file to discover all available pages before exploring further.
# Adding images to your LearnPack courses and packages
> Step-by-step guide to generate and embed AI-created diagrams, screenshots, and illustrations with Rigobot; fully browser-based, context-aware, and aligned to your lesson goals.
Visuals are one of the most powerful ways to reinforce learning. With LearnPack, you can go beyond plain text and quizzes by integrating **AI-generated diagrams, screenshots, and illustrations** directly into your tutorials. This capability helps students understand complex concepts faster, while instructors save hours they would spend sourcing or designing graphics. ✨
Browser-only: everything happens inside LearnPack, no extra design tools needed.
## Why Images Matter in LearnPack
* **Faster comprehension:** diagrams simplify abstract concepts.
* **Engagement boost:** visual learners retain more when lessons include images.
* **Consistency:** every generated image matches the **context** of your course content.
* **Scalability:** no design software or external resources, Rigobot will handle it. 🤖
## The Role of LearnPack’s AI mentor, Rigobot
Rigobot is not just a tutor, it is also your creative partner. When you build a tutorial, text and quizzes appear first, images are handled with care: **Rigobot pauses and asks what image you want**, so each visual is **context-aware** and **hyper-personalized**.
* **Memory:** Rigobot already knows the lesson’s topic and goals.
* **Context awareness:** proposes diagrams or illustrations that match the teaching moment.
* **Flexibility:** accept the suggestion, or edit the prompt to generate something else.
## Example: Photography Tutorial 📸
Suppose you are building *Basics of Photography for Beginners*.
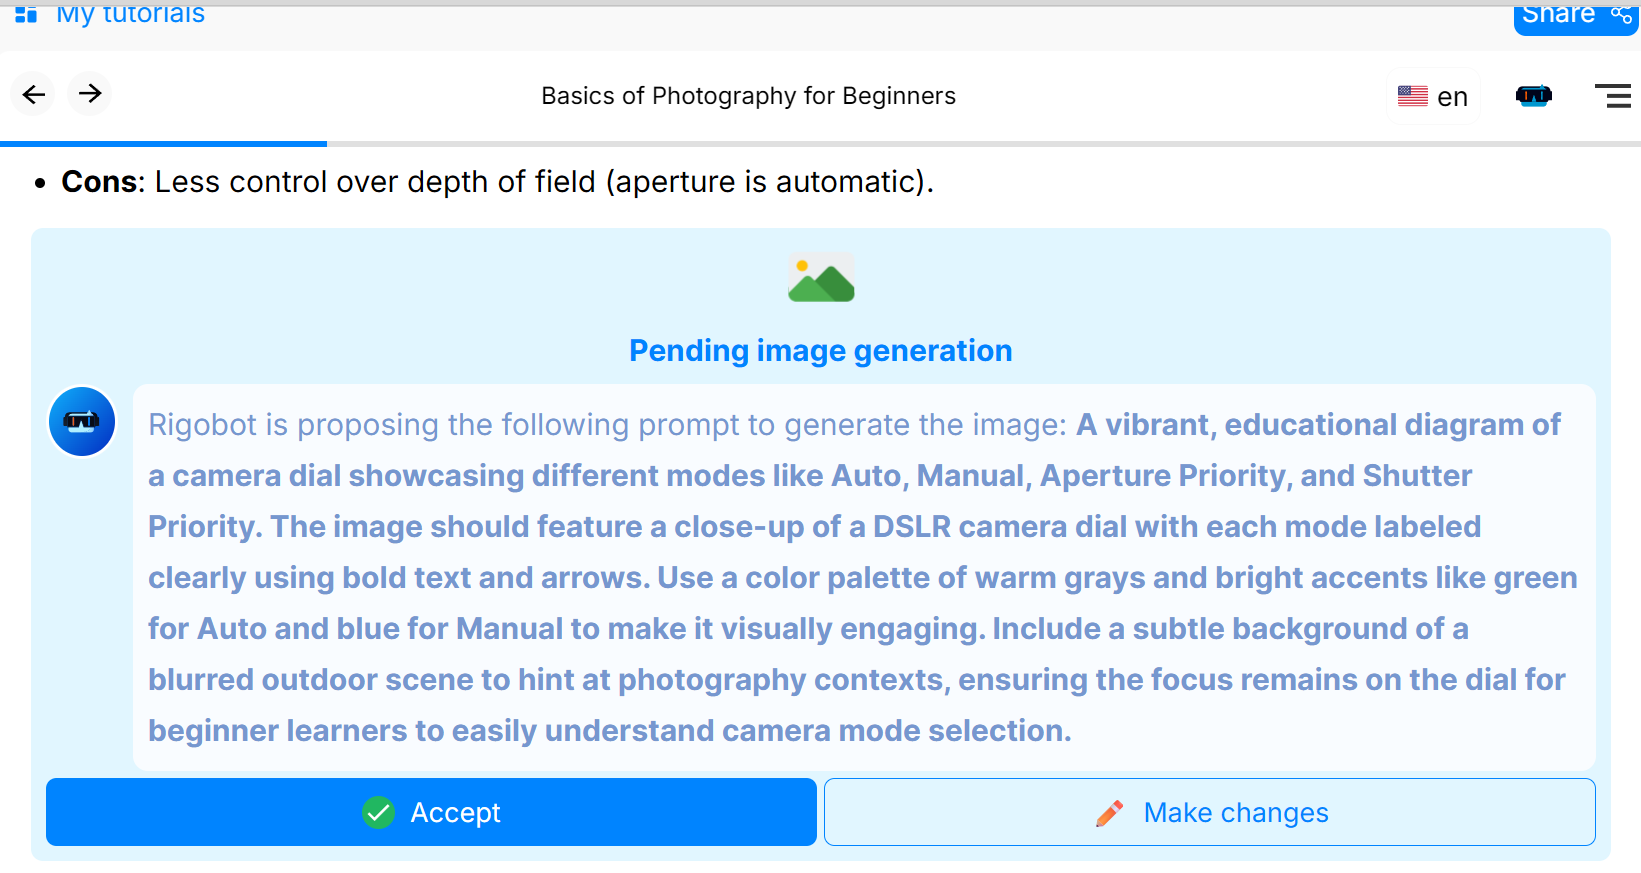
Rigobot might propose:
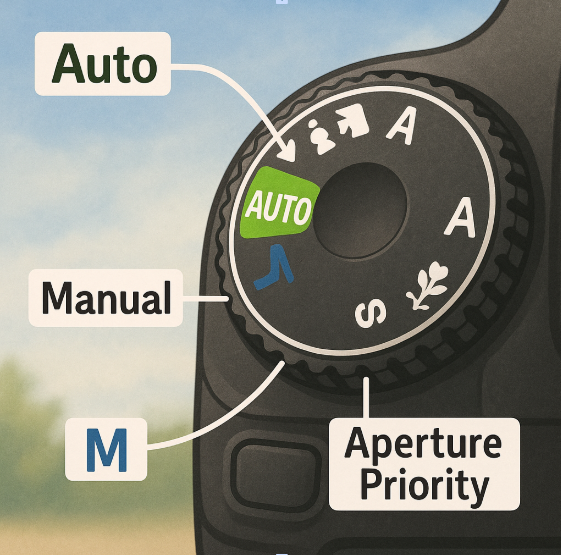
> A vibrant, educational diagram of a camera dial showcasing different modes like Auto, Manual, Aperture Priority, and Shutter Priority. The image should feature a close-up of a DSLR camera dial with each mode labeled clearly using bold text and arrows. Use a color palette of warm grays and bright accents like green for Auto and blue for Manual to make it visually engaging. Include a subtle background of a blurred outdoor scene to hint at photography contexts, ensuring the focus remains on the dial for beginner learners to easily understand camera mode selection.
**Prompt preview inside LearnPack:**
 **Result (dial diagram):**
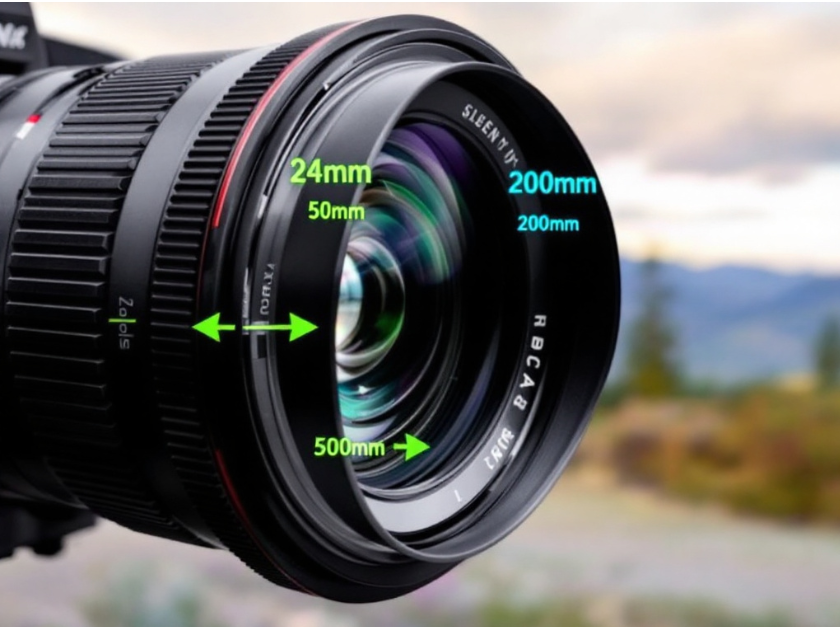
 If you prefer to emphasize another aspect, such as focal length, you can rewrite the prompt:
> A vibrant, educational diagram of a camera lens showcasing different focal length settings like 24mm, 50mm, and 200mm.
**Result (lens diagram):**
If you prefer to emphasize another aspect, such as focal length, you can rewrite the prompt:
> A vibrant, educational diagram of a camera lens showcasing different focal length settings like 24mm, 50mm, and 200mm.
**Result (lens diagram):**
 This process keeps visuals aligned to the learning goal, not just decoration.
## Quick rubric: which visual to use?
| Visual type | Best for | Prompt cues (keep it simple) |
| ---------------- | ---------------------------------------- | -------------------------------------------------------------------- |
| **Diagram** | Abstract concepts, relationships, flows | “Label X, Y, Z”, “add arrows”, “clear legends”, “neutral background” |
| **Screenshot** | UI steps, button locations, settings | “Crop to visible area”, “highlight step 3”, “blur irrelevant panels” |
| **Illustration** | Concept overviews, metaphors, engagement | “High-contrast icons”, “clean lines”, “single focal point” |
Tip: after adding an image, reinforce learning with a quick check. See quizzes & projects.
## How to Add Images: Step by Step
Go through the regular setup: topic, goals, duration, and purpose.
This process keeps visuals aligned to the learning goal, not just decoration.
## Quick rubric: which visual to use?
| Visual type | Best for | Prompt cues (keep it simple) |
| ---------------- | ---------------------------------------- | -------------------------------------------------------------------- |
| **Diagram** | Abstract concepts, relationships, flows | “Label X, Y, Z”, “add arrows”, “clear legends”, “neutral background” |
| **Screenshot** | UI steps, button locations, settings | “Crop to visible area”, “highlight step 3”, “blur irrelevant panels” |
| **Illustration** | Concept overviews, metaphors, engagement | “High-contrast icons”, “clean lines”, “single focal point” |
Tip: after adding an image, reinforce learning with a quick check. See quizzes & projects.
## How to Add Images: Step by Step
Go through the regular setup: topic, goals, duration, and purpose.
Start fast: Quickstart (5 min).
When Rigobot pauses with a proposed image idea, review whether it helps your learners at that point.
Decide if the diagram or illustration clarifies the concept. If not, adjust the prompt: specify labels, arrows, or style.
Keep the suggestion or refine it with your own instructions, for example, “focus on shutter speed vs aperture”.
Rigobot will create and insert the image into your course. You can regenerate or replace it anytime. ✅
## Final Advantage
With LearnPack, visuals are not an afterthought. They are **intelligently suggested**, easy to modify, and aligned with your objectives. Combined with quizzes, challenges, and **Rigobot’s** guidance, images become part of a **hyper-personalized, AI-powered learning experience** that drives higher engagement and stronger retention.
## Do this next
Generate your first course and publish it.
Visual explainers at the right step.
See how the built-in tutor works.
Share links, export SCORM, embed.
## See also
* [Converting a PDF into an interactive course](/creating-courses/converting-a-pdf-into-an-interactive-course)
* [Creating interactive tutorials from YouTube videos (with transcripts)](/creating-courses/creating-interactive-tutorials-from-youTube-videos)
* [Best practices for course design](/creating-courses/best-practices-for-course-design)